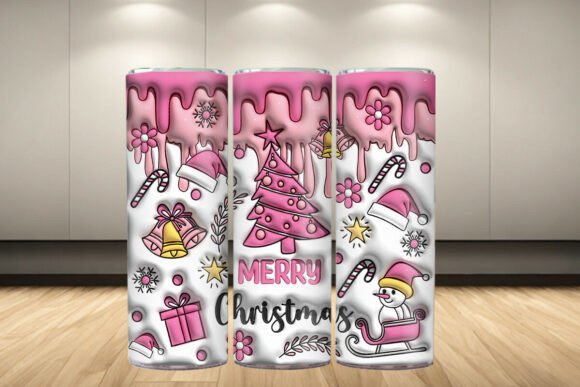
Mastering Christmas 3D Tumbler Wrap Design 3 for Flawless Sublimation Results
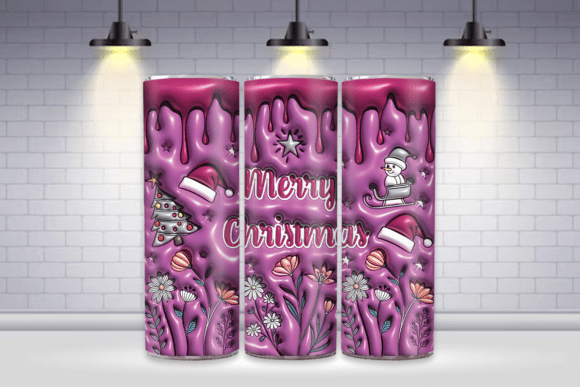
The holiday season brings a surge in demand for personalized drinkware, and nothing captures the festive spirit quite like a vibrant, custom-printed tumbler. If you are looking to elevate your product line or create unique gifts, Christmas 3D Tumbler Wrap Design 3 offers a visually striking solution. This specific design leverages depth and dimension to make standard 20oz skinny tumblers stand out on crowded shelves or social media feeds. However, possessing a beautiful digital file is only half the battle. Many creators stumble not because of a lack of creativity, but due to technical oversights during the preparation and printing phases.
Understanding the nuances of this specific asset can save you time, materials, and frustration. When you purchase this package, you receive two distinct PNG files: one tapered and one non-tapered, both sized at 9.3″ x 8.2″ and rendered at 300 DPI. While this seems straightforward, assuming these files are "plug-and-play" without understanding your specific hardware and substrate can lead to disappointing results. Let’s explore common pitfalls and how to navigate them effectively.
Misunderstanding File Types and Printer Compatibility
One of the most frequent mistakes beginners make is confusing sublimation designs with cutting files. It is crucial to note that this is NOT a cutting file. You cannot send these PNGs directly to a Cricut or Silhouette machine for vinyl cutting. They are raster images designed specifically for heat transfer via sublimation printing. Attempting to use them as vector cut files will result in errors and wasted time.
Furthermore, while the files are provided at a high resolution of 300 DPI, the final output quality depends heavily on your printer’s color profile and ink saturation. A common misconception is that what you see on your monitor is exactly what will print. In reality, colors shown may vary slightly due to differences in computer screens and printer calibration. To avoid dull or washed-out prints, always perform a test print on standard paper first. Check for color accuracy and alignment before committing to expensive sublimation paper and blanks.
The Critical Difference Between Tapered and Straight Wraps
The inclusion of both tapered and straight (non-tapered) versions of Christmas 3D Tumbler Wrap Design 3 is a significant advantage, but only if you know which one to use. A major error occurs when creators apply the straight wrap to a tapered tumbler or vice versa.
- Tapered Tumblers: Most 20oz skinny tumblers are slightly narrower at the bottom than at the top. Using the straight 9.3″ x 8.2″ file on a tapered cup will cause the design to distort, stretch, or leave gaps at the seams.
- Straight Tumblers: If your blank has uniform width from top to bottom, the tapered file will result in overlapping edges or misaligned patterns.
To ensure a seamless look, measure your blank accurately. If you are unsure, the tapered version is often safer for standard industry 20oz skinny tumblers, but verifying the manufacturer’s specifications is the best practice. Ignoring this step leads to visible seams and a professional appearance that looks amateurish.
Overlooking the Importance of Proper Heat Press Settings
Even with the perfect file and correct tumbler match, poor heat press technique can ruin the final product. Many users underestimate the impact of pressure and time. Sublimation requires consistent, firm pressure to transfer the ink from the paper into the polymer coating of the tumbler. Insufficient pressure results in ghosting or faint areas, particularly in the detailed 3D elements of the design.
Additionally, wrapping the tumbler too loosely allows the paper to shift during the heating process. This movement causes blurring, which destroys the crispness of the 3D effect. Always use high-quality heat-resistant tape to secure the sublimation paper tightly against the tumbler. Ensure there are no air bubbles or wrinkles under the paper. A practical tip is to wrap the paper around the tumbler and secure it before placing it in the press, checking that the design aligns perfectly with the seam.
Neglecting Pre-Press Preparation
Another overlooked detail is the condition of the tumbler itself. Dust, oils from handling, or residual manufacturing coatings can interfere with ink absorption. Before applying your Christmas 3D Tumbler Wrap Design 3, wipe down the tumbler with lint-free cloth and isopropyl alcohol. This simple step ensures a clean surface for optimal ink bonding.
Moreover, pre-pressing the tumbler for a few seconds can remove moisture and warm up the surface, leading to more vibrant colors. Skipping this step might seem like a time-saver, but it often results in inconsistent color saturation, especially in darker or more complex areas of the 3D design.
Managing Expectations Regarding AI-Generated Elements
This graphic was created with a combination of hand drawing and AI. While this hybrid approach allows for intricate details and unique textures, it also means that some elements may have subtle complexities that require careful handling. For instance, fine lines or gradient transitions in the 3D effects might appear differently depending on the ink brand used.
It is advisable to familiarize yourself with how your specific sublimation ink handles gradients. If you notice banding or loss of detail in the 3D shadows, adjust your printer’s quality settings to "High" or "Photo" mode. This increases the ink density and can help preserve the delicate details inherent in the design.
Final Checks Before Full-Scale Production
Before launching a full batch of products using Christmas 3D Tumbler Wrap Design 3, take the time to evaluate a single completed unit. Check for:
- Seam Alignment: Does the pattern meet cleanly without obvious breaks?
- Color Vibrancy: Are the reds, greens, and golds rich and true to the preview?
- Surface Smoothness: Is there any texture from the paper left on the tumbler?
If any of these elements are lacking, revisit your process. Adjust your heat press time by five-second increments, check your pressure gauge, or verify your ICC profile. Remember, consistency is key in building a reputable brand. By paying attention to these technical details, you transform a simple digital download into a high-quality, sellable product that delights customers.
Ultimately, success with sublimation lies in the details. By respecting the file types, choosing the correct wrap variant, and mastering your heat press technique, you can fully leverage the potential of this festive design. Avoid the common shortcuts that lead to waste, and instead, invest time in precision. Your customers will appreciate the professional finish, and you will enjoy the efficiency of a well-honed workflow.